
The Vintage Embroidery Wall-Panel Tutorial
No…still ain’t got a better, shorter name for that one! But here it finally is, the tutorial which results in something like this: This is a wall panel made of vintage embroideries, the ones I always take home with me when I find them at a thriftshop. (It always makes me sad, that all those hours of needlework end up at a thriftshop.) So, if you too have a pile of embroideries you want to join in one big piece, here we go!

You’ll need: some nice (a bit matching) vintage embroideries, some strong thread, a needle, a wooden lath and a tacker (a hammer and nails will do too). The cardboard can be used to stretch or tighten embroideries, I’ll explain that part of the project seperately.
Now, let’s start with the most barbaric part of the project: getting the embroidery off it’s original frame. (I suggest you do this when you’ve just had an awful day at work, or just discovered the neighbour’s dog pooped in your front garden again…you’ll need some aggression to do this.) Tear off the cardboard at the back and remove the frame. Careful with your hands!
Like this (I even needed a pincer to remove the frame):

 Got rid of the aggression? Good! You’ve now saved yourself a lifetime of anger-management lessons! Yay!
What you have now is a perfect, frameless embroidery. If you’re lucky, it’s already attached to a piece of cardboard, so it’ll stay in good shape when you attach it to the other embroideries. If you’re left with a floppy mess, you’ll need to tighten the embroidery with a piece of cardboard, I’ll describe that part in a second post.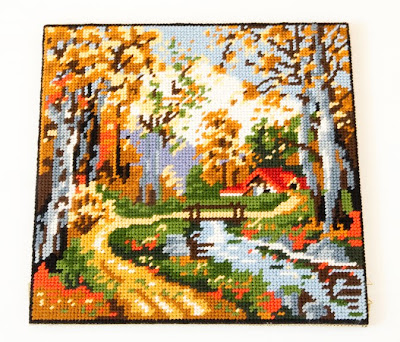 Arrange the embroideries. They may overlap, but the most important thing is that you’re satisfied with the arrangement. You don’t want to pass by everytime and feel annoyed (like me) because you settled for good enough ;-)
 Arrange the embroideries. They may overlap, but the most important thing is that you’re satisfied with the arrangement. You don’t want to pass by everytime and feel annoyed (like me) because you settled for good enough ;-)
If needed, mark out the wooden lath and make it fit the width of the panel with a saw (or with your teeth, if you are The Hulk.)
 Attach the upper embroideries to the lath with a tacker or with nails.
 Turn the whole panel around (you’ll need to arrange the embroideries backwards, it’s a bit tricky, but you’ll manage!).
Sew the touching sides of the embroideries to the ones that are attached to the lath and to each other with strong thread and a sharp needle (be careful you won’t puncture your fingers like I did…five times).
Remember, it’s the back, you won’t see it once it’s mounted to your wall, no one will know it’s a bit messy. (I had to write this on a mirror and humm it every day before I got to this point.)
The back looks like this:


Make sure the embroideries are well tightened, they’ll need to defy gravity! That’s all, don’t make a big fuss about it, as long as it sticks together, you’re a winner! :-D
If there’s anything that’s just completely incomprehensible in this tutorial, please leave me a note. If you want to share your result, please do! Good luck!
If there’s anything that’s just completely incomprehensible in this tutorial, please leave me a note. If you want to share your result, please do! Good luck!

What a fabulous idea, thank you so much for sharing…. I might have a go at this!
Great project think I will try this weekend.
Thanks for sharing.